After receiving several complimentary and encouraging emails from across the US regarding my previous post "Life Hack", I thought I'd take some time to elaborate on my own system of organizing creative thoughts and projects. As a full time student, full time dreamer, and part time employee, I constantly have at least six projects working simultaneously. How do I keep my sanity? Years of trial and error.
Everyone masters their own efficiency through a thousand different variables, and the most challenging element of organization is figuring out what system works best for you. Do you need to have everything labeled? Tabs? Post-its? Color coded pens? Graphs? Flow charts? Lists upon lists (or at times, lists OF other lists)- Luckily, we've got technology available to us to help.
There are lots of apps to help you keep your head on straight- I've been using the Astrid to-do list on my Droid, which links up with Remember The Milk. Great for micromanaging and remembering deadlines. The Droid also synchs with Gmail and Google Calendar, which is very helpful for appointments and such.
But what about project productivity?
When I was a freshman, I carried three books with me at all times: a planner, a sketchbook, and a journal. That was such a hassle. I needed to consolidate. I tried to merge the journal (mostly for songwriting, things to remember, ideas to explore later) and the sketchbook. I bought a book I liked (texture is IMMENSELY important to me for some reason. The pages have to feel good, or I'll never use it.) and sectioned it off: Music, Art, Write, Sing, Draw, Misc., and Index.

It worked, briefly. The biggest issue was that many of my ideas are overlapping- I could never figure out which tab I wrote something under. A little too organized for me. Index, however, was something I liked. I numbered the pages of the book and cataloged my subjects in the back. Great for finding lost ideas in old sketchbooks.
...
On to attempt #2: The handmade planner.
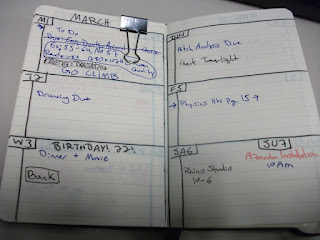
This is an attempt to combine the journal and planner books.

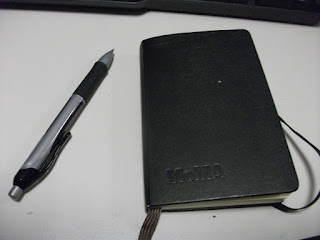
Step 1: Get a nice ruled pocket Moleskine. Sturdy enough to last a long time. Even features a pocket in the back for business cards and what not.

Step 2: Draw the planner portion in. I included margins on the right for footnotes, like the arrow symbol which indicates a reference page. "See Page 15"

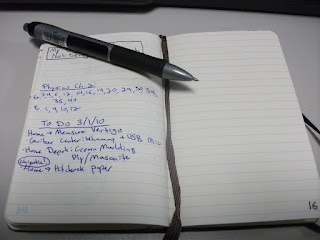
Step 3: After the planner portion is filled, number the remaining pages for references. So, if I can't fit all the info I need in the planner's boxes, I can foreword that info to the back of the book. This includes phone numbers, addresses, lists (always date them), and things to remember like song names and artists to investigate later.
Step 4: Index! Be sure to include an index so you can easily find those odds and ends that go missing in your reference pages.
As for big projects, I've got a dry erase board above my workbench divided into squares. Each square features the title of the project, its deadline, the materials I still need to buy, and the next few steps of production. It's a great visual method to keep things in order.
...
Hopefully this info will help you figure out your own system of organization! Feel free to email me your questions and comments, ->SavannaLeighArt@gmail.com<-


0 comments:
Post a Comment